Crafting Styled Spreadsheets with openpyxl
If you have ever seen the inner workings of the typical small to medium-sized business, you’ve seen a deeply disturbing and upsetting reality. The backbone of our economy runs on Microsoft Excel.

I have worked in one of these companies for about a decade now. In the beginning, I was quick to find VLOOKUP and INDEX-MATCH to gain some leverage. However, since we know that Excel is a database, I went down the route of Microsoft Access, then Microsoft SQL Server. Finally, I found Python, and I was determined to never open Excel again.
That plan was doomed, as the one thing people love more than automation is making Excel files!

openpyxl
Openpyxl is a python library used for reading and writing excel files. If you’ve ever done a fresh install of pandas and tried to use read_excel(), you’ve probably been hit with an error message asking you to install the dependency, openpyxl. It can manipulate rows, columns, cells, and styling, and it supports features like formulas, charts, and images. (docs: https://Openpyxl.readthedocs.io/en/stable/)
In my case, I was faced with making many dozens of spreadsheets for presenting product pricing to customers, among other things. Every workbook should contain different data and a different number of sheets. The main sheet looks like this (dollar amounts removed).
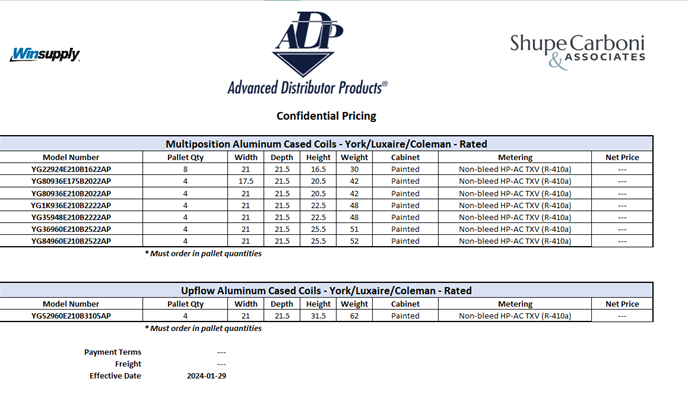
Aside from the data itself, there are images to be placed, formatting around headings, conditional asterisk notes, etc.
Lets dive in to my approach: making a cursor, using template sheets, inserting rows, copying styling, inserting images, and saving the file as an object for delivery over HTTP.
Making a cursor and using templates
Setting up the cursor
Once I got past the basics of loading a workbook and setting up my active sheet, I was left wondering, how do I keep track of where my “cursor” is in the workbook? (Old habits die hard.) In openpyxl, there is no such thing.
I knew I’d be looping over data and inserting it, as well as dynamically adding additional product blocks (the sections with the light blue header.) It seemed easier to reason about inserting data and managing styling by enabling relative movements as I’m looping. So, I hand-rolled my Cursor, making it ** un-packable for convenience (and fun).
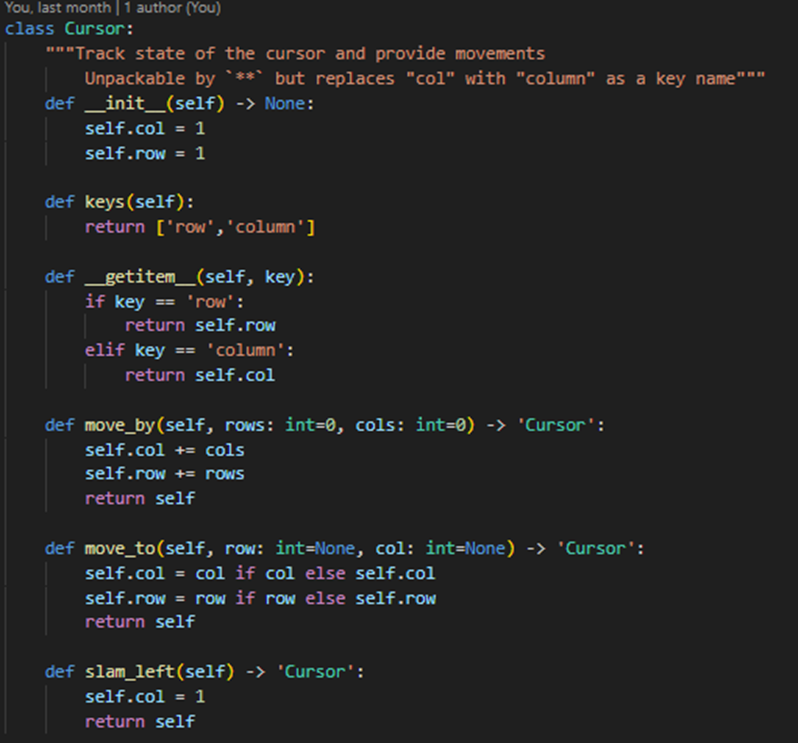
- The cursor initializes on the first row and first column (openpyxl uses 1-based indexing … most of the time.)
keys() and__get_item__() enable**unpackingmove_by()andmove_to()methods for either absolute or relative movements. For fun, I included a somewhat redundantslam_left() method to move to the first column of whichever row the cursor is on.
(I did a switch-a-roo with col and column – because I liked the look of ‘col’ and ‘row’ and openpyxl uses ‘column”’)
For creating the excel file, I’m doing all my work in a class called PriceBook, which takes care of loading workbook templates, initializing a cursor as an attribute, and a bunch of other stuff.
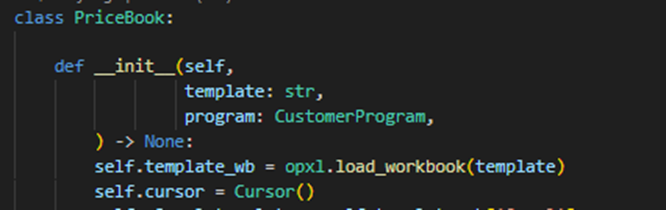
The program argument is the container for all of the customer-specific data and represents the data to be inserted. The Cursor has been instantiated as self.cursor
In another method, I define an attribute called active, which sets the active sheet. This active sheet has methods like cell(), which either gets or sets the value of a cell, depending on whether you give it a value or not. However, cell() takes absolute row and column numbers.
The following wrapper function is where the real magic happens with the cursor. It gets or sets the value of the cell on which the cursor is currently sitting, taking only the value as an argument and returning the Cell object. You’ll see why this is nice in a moment.

Using templates
Rather than starting from scratch and having to set up all the styling myself in openpyxl, I made a handful of templates, and with these templates I can copy styling directly.
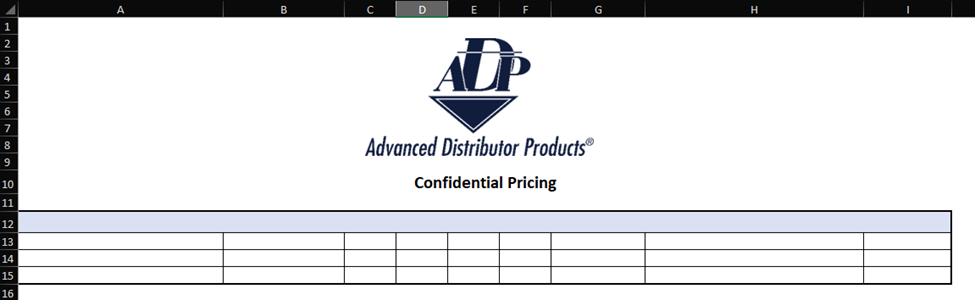
The 4-row block with a light blue header is the Product Block. This section may need to be copied in-whole and inserted below to make more blocks and the number of products listed in each block will vary.
Inserting rows
Since we’re using a template, all we have to do to change the number of rows in a product block is to move the cursor down to somewhere in the middle of the block and insert rows. We would call self.cursor.move_to(row=14) and then insert.
The openpyxl Worksheet object, which I have set to self.active, provides insert_rows(). However, this method does not copy cell styling. What you would expect when inserting rows in the middle of a formatted area is that styling would also get copied. So, I wrapped the openpyxl method to include copying of styles and utilizing the cursor to set the location.

This method
- Grabs the array of
Cellobjects on the row the cursor starts on. After executing openpyxl’sinsert_rows()method, it loops over all of the new, unformattedCellobjects in the new rows and copies styling. - Uses the
Cursor’smove_by() method to increment row position for alln_rowsjust inserted. - At the end it moves back to the starting row.
This method recreates the behavior one would expect while inserting rows as an Excel user.
Copying the Product Block
For copying an entire product block, the template makes it easy. I take the cell range of the block from the template and utilize the cursor position to calculate the offset so that the copy is placed correctly.
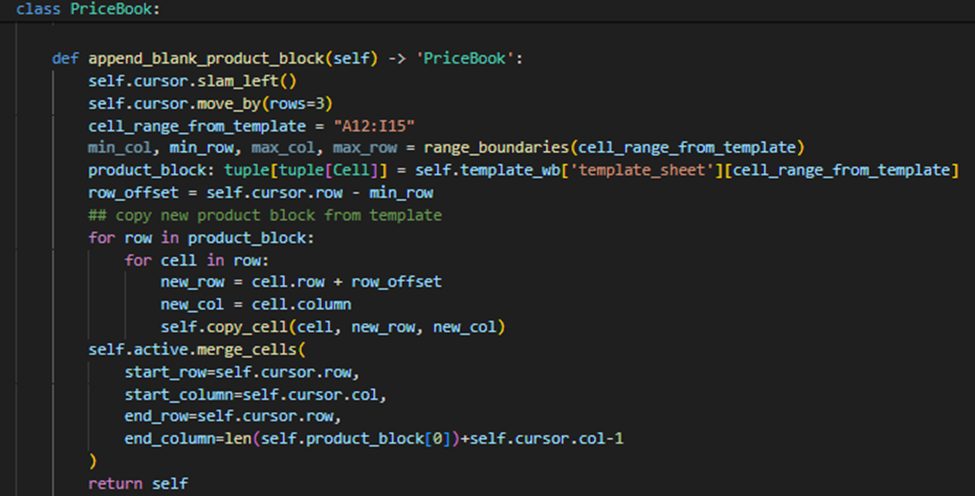
The template Product Block is accessed as a nested tuple of Cell objects, such that each tuple of Cells represents values of a row, and the containing tuple contains the rows as you specified in the cell range.
- Notice I used a custom
copy_cell() method.copy_cell() is as wrapper method that takes care of copying style as well as contents. - Merging cells (the light blue shaded area) must be done manually using openpyxl’s
merge_cells(). The cursor position is used to inform that operation.
Here’s the copy_cell() method (and its companion), which uses the built-in copy function from the copy module to take all elements of the cell styling and apply them to the new cells.
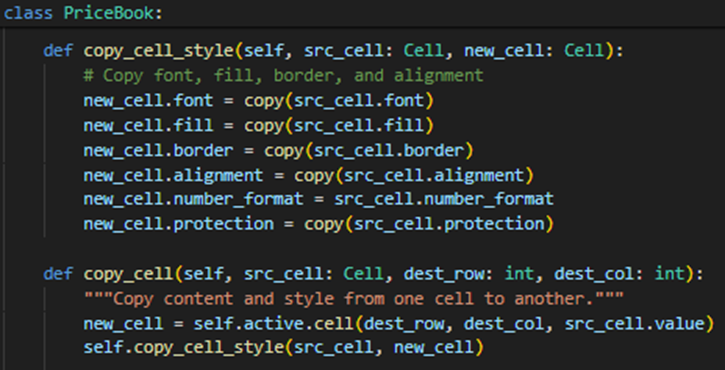
Since this copy operation is between different sheets (from the template to our active sheet), we can’t do a basic copy of cell._style like we did in the insert_rows() wrapper function. Instead, we have to copy each style attribute from the source cells (in the template sheet) to the destination cells (on our active sheet). In addition, I opted to use the openpyxl cell() method, since it is invoked in the context of an offset from the cursor position.
Inserting Data
As a long-time pandas user, I am drawn to using DataFrames anytime I have a table of data. After moving my cursor into position, I execute my insert_data() method, which takes in a DataFrame and some options. The data is then inserted by looping over the rows.
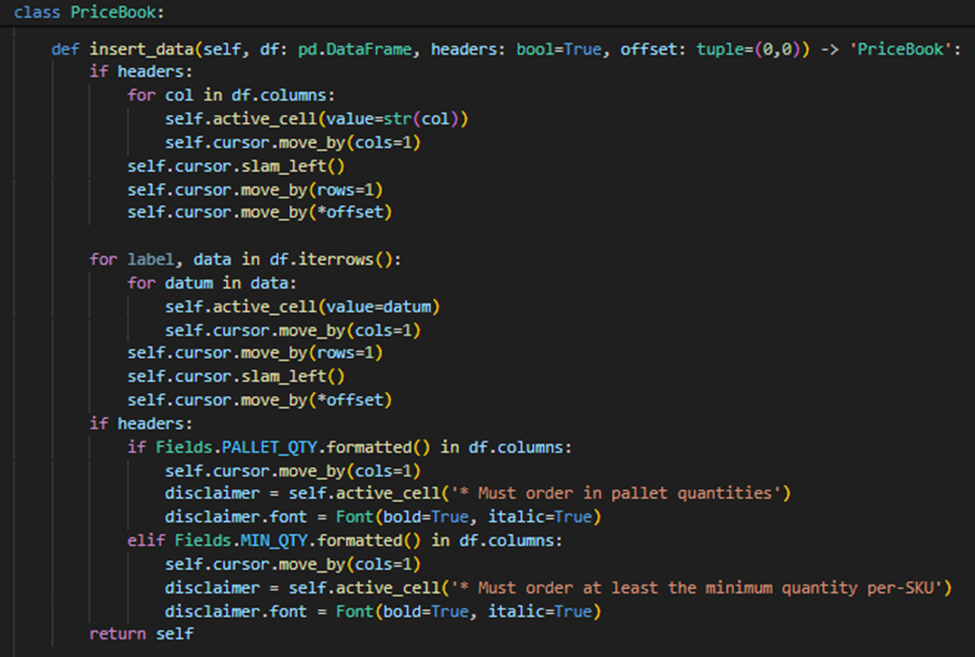
Here’s what’s going on:
- If I want headers copied, it will loop over my
DataFramecolumns and insert the column names using myactive_cell() method. - For the data itself, I use pandas
iterrows(), ignoring the labels, looping over each value and setting it withactive_cell(). - At the end, I have custom logic to add a footnote based on columns present in the data inserted. Styling is set using the openpyxl
Fontclass and applying it to the cell’sfontattribute. Fieldsis anEnumthat I use to avoid hard-coding column names all over the place, which are prone to spelling errors.
Working with Images
Images can be tricky in openpyxl. The active sheet provides a method for inserting images called add_image(). This method takes a Pillow Image object as well as an anchor position. This works fine on its own, so long as you are okay with anchoring to cell positions exactly (i.e. “C1” will start the image’s upper-left corner exactly on C1’s upper-left corner), but the moment you want to move that image around precisely, things get complicated.
In this code, I set up my own class for logo images called Logo, which takes arguments to precisely set the anchor, depending on which sheet it is going on. Perhaps there’s a cleaner and more dynamic way to do this, but this is what I went with. (Note: The anchor classes and converters are all provided by openpyxl.)
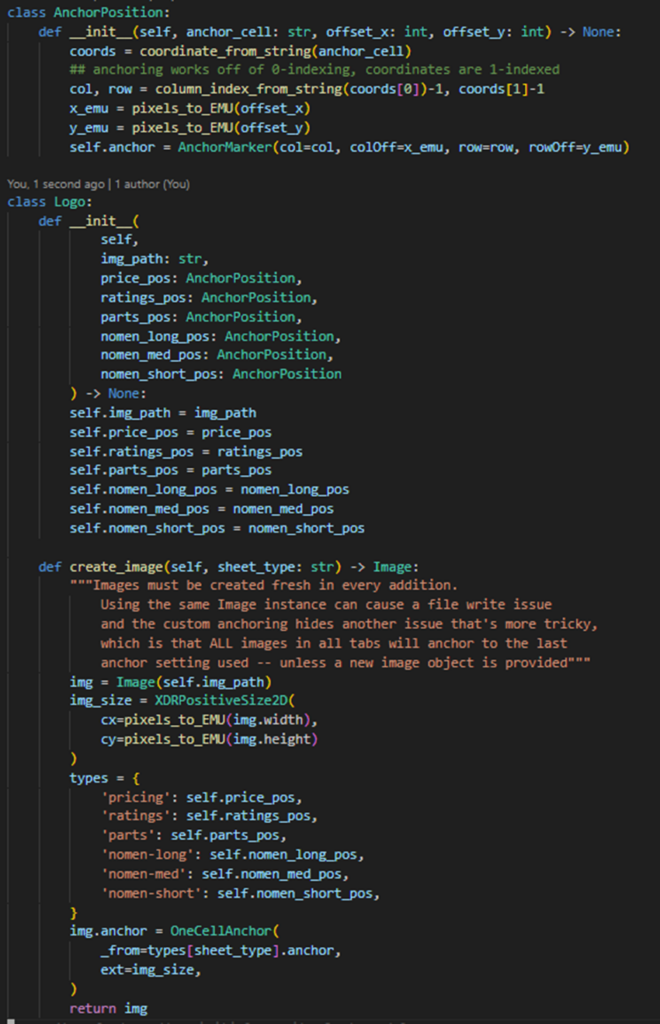
- The
create_image()method creates anImageobject, stores its 2-dimensional size serializable as an XML Drawing (for Excel compatibility), and returns the image object with the anchor initialized using theAnchorPositionreturned by the dictionary. - The
AnchorPositionclass takes in the anchor cell (i.e. ‘C1’) and the desired offset in pixels. Pixels are converted into English Metric Units (EMUs), the unit of measurement used by Excel, and creates the anchor using the AnchorMarker class.
*One EMU represents one inch divided by 914,400 or one centimeter divided by 360,000
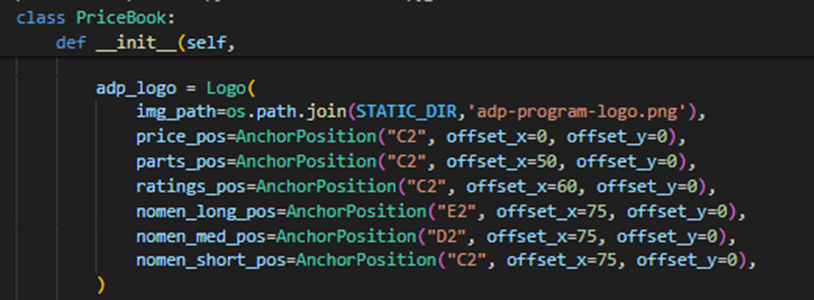
While initializing PriceBook, I can set up precise logo image placements specific to the sheet they go on. This enables the precision required to center the logos properly (most of the time, at least.)
Here’s one example
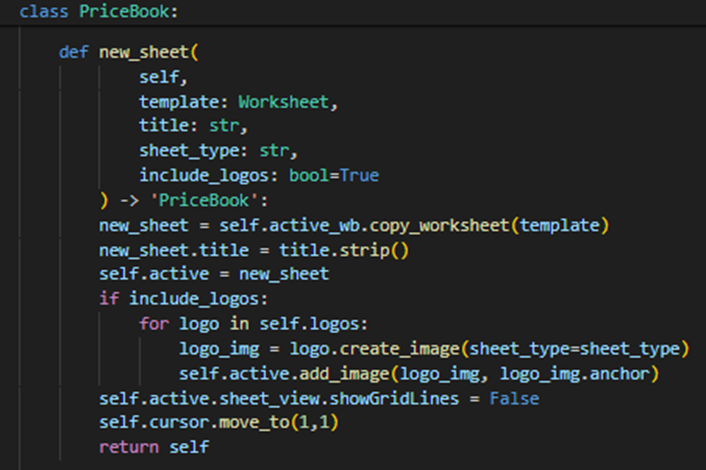
When creating new sheets, I loop over a collection of these Logo objects and insert the logo images. Here is how I implemented that in a new_sheet() method, where sheet_type is used to look up which position to use.
Saving the File
Now we have our spreadsheet looking absolutely perfect. We have logos placed, data filled out just-so, with styling and all. Now, we’d like to deliver this file.
Openpyxl documentation shows the obvious use case, saving to disk using their save() method on the workbook. However, what if I want to deliver this file over HTTP?
Looking under the hood, save() passes the “filename” argument straight into ExcelWriter, and those familiar with ExcelWriter know that you can pass a BytesIO object to it and write to that instead. So, for my saving operation, I do exactly that, but only after doing some cleanup.
- removing the template sheets
- setting the active sheet on-open (for a user) to the first sheet
- catching an exception thrown when a file is empty for some reason
- making sure to call the
closemethod on the template workbook.
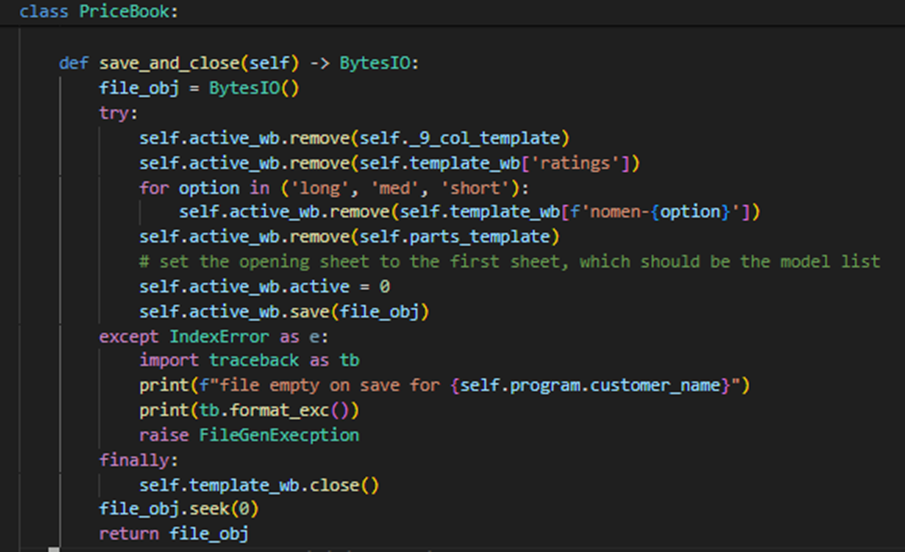
The returned object can go straight into an HTTP payload for download on the client side. Here’s the result (again!)
Final Thoughts
In our last meeting, someone brought up that XKCD comic about the tradeoff between spending time doing a task and sinking time into making it more efficient. Believe me, that comic ran through my head often, wondering if perhaps I was overengineering the process of making an Excel document.
However, the result opened a path to fully automating the process, a tedious cut-and-paste job rife with lookups in reference tables to record product dimensions, calculate pricing, etc.. Since getting this working a couple months ago, I’ve generated hundreds of files like these for customer proposals, many more than I had originally been tasked to make. I continue to generate more to this day, using a custom TUI to talk to the API and download the files.
Have you found yourself making Excel spreadsheets like this? I’d love to hear about your experience and your tips and tricks using Python.
Enjoy!
ABOUT THE AUTHOR
Joseph Carboni is a multifaceted programmer with a background in bioinformatics, neuroscience, and sales, now focusing on Python development. He developed a ribosomal loading model and contributed to a neuroscience paper before transitioning to a six-year sales career, enhancing his understanding of business and client relations. Currently, he’s a Python Developer at Shupe, Carboni & Associates, improving business processes, and runs Carboni Technology for independent tech projects. Joseph welcomes collaborations and discussions via LinkedIn (Joseph Carboni), Twitter (@JoeCarboni1), or email (joe@carbonitech.com).
PUBLISH YOUR WRITINGS HERE!
We are always looking to publish your writings on the pyATL website. All content must be related to Python, non-commercial (pitches), and comply with out code of conduct.
If you’re interested, reach out to the editors at hello@pyatl.dev